
It’s time to end the walk of shame!
So, you’ve had a few lessons, you’ve mastered the water start and you are up on the board doing runs… well done!
Unfortunately, the walk of shame is still a reality and it’s frustrating and exhausting, don’t worry, we’ve all been there.
Once you have your kite flying skills nailed, mastered the board start and can kite a fair way in either direction, it is time to turn your focus to kiting upwind.
Here are our top tips to assist your upwind progression and the beginning of your kitesurfing freedom.
- Get speed and edge:
You will not be able to go directly upwind immediately after a waterstart; you will need to go downwind first to gain speed. Once you have dived your kite with power to lift our body out of the water, it’s important to point your board downwind, or toward your kite. Having a flatter board will allow you to float, or plane easier across the water, giving you more surface area of the board on the water which equals speed. When you have enough speed you can then begin to turn your head and shoulders, dig in your back heel, and edge your body upwind. Don’t be disheartened if you can go upwind in one direction and not the other – this is completely normal as one side is generally dominant to the other.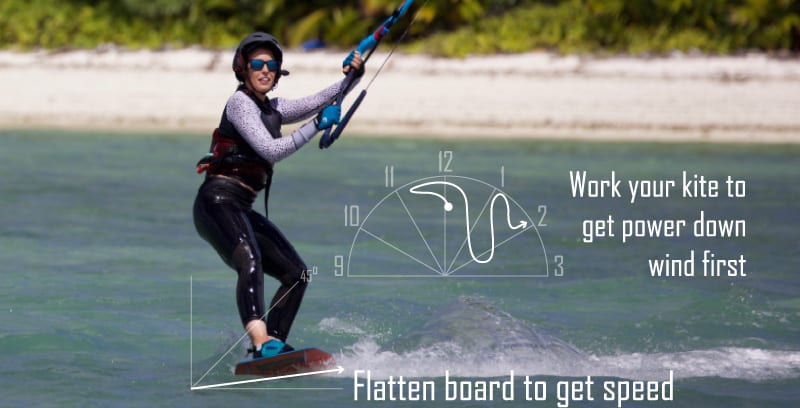
Bianca on Cocos Islands diving the kite and flattening the board before heading upwind - Kite Position and Size:
In order to ride against the force of the wind, you will need sufficient power in your kite. If there is not enough wind and you are underpowered, it will be impossible to ride upwind. The same will apply if you are overpowered. It is therefore crucial that you select the right kite size for the conditions. Once you are up and riding with speed, you will need to direct your kite to 10 (going left) and 2 (going right), or roughly a 45-degree angle. If your kite is too high, it will pull you vertically up rather than horizontally upwind. If you continue to struggle, bring your kite lower. In addition, you will want to park your kite in one place once you have sufficient power, rather than continually move it.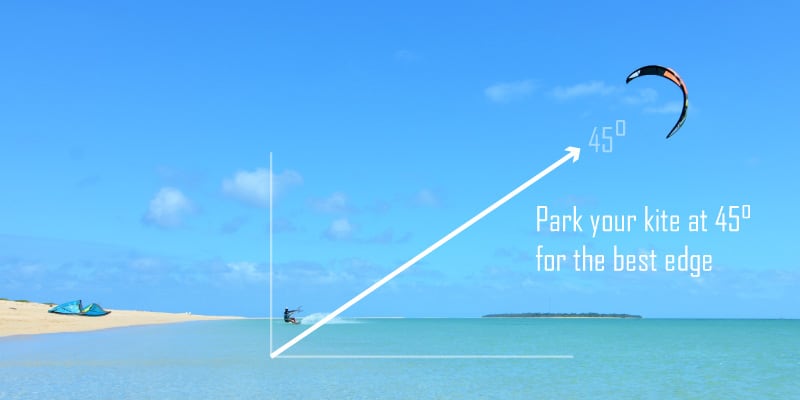
Levi on the Masig Magic Mile parking his kite at 45degrees - Body position:
Pick a point upwind where you want to travel; it is helpful to aim for something on the beach, or on the horizon. Your head and shoulders should face the direction of travel – the general rule is that you should look at the point where you want to go. Your arms should be outstretched and not too bent – remove your front hand and keep your backhand on the bar to make it easier to turn your body. Do stick to two hands on the bar if you are not confident to remove one. Your front leg should be straight, or close to straight, with your rear leg slightly bent. The best riding position is to have your board opposing the kite both at 45degrees to each other. This allows the forces to align and the wind and water to flow easily and efficiently across all surfaces pushing you forwards, and across or upwind.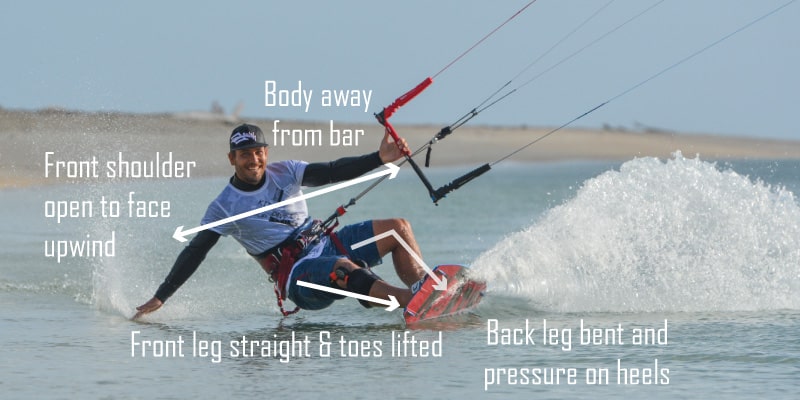
Ben showing us the perfect body position
Riding upwind can be a difficult progression step for many kiters after mastering the water start and being able to ride a short distance. The practice hours can be tedious, but nothing feels better than nailing it and avoiding the walk of shame!
Check out our Cocos Islands Progression Tours for the perfect learning ground to go upwind. Sandy beaches, loads of space and a full-time support boat, we get beginners up and riding with confidence within just a few days.

Stay happy, stay healthy and go Kitesurfing!
Heather Menaglio